Gourd Birdhouse
Gourd Birdhouse
Gourd Birdhouse
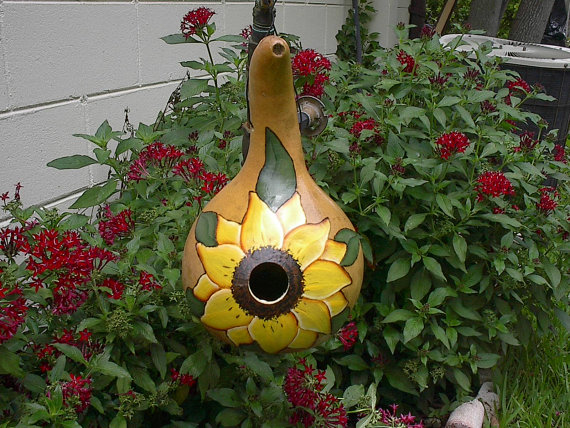
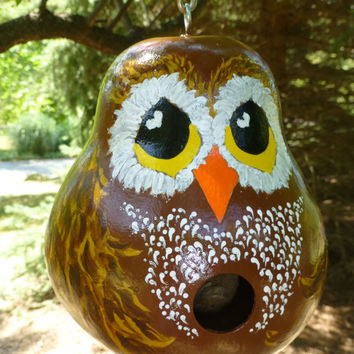
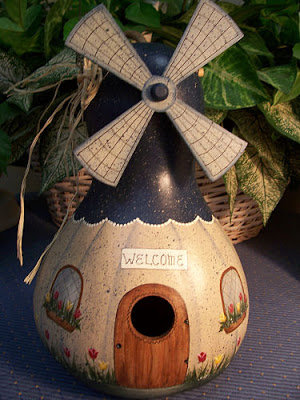
Gourds make great birdhouses, and the time spent creating one is a worthwhile investment. Cured hard-shell gourds are almost as tough as plywood. And they will last up to 30 years if properly coated with a preservative and handled with a little care.
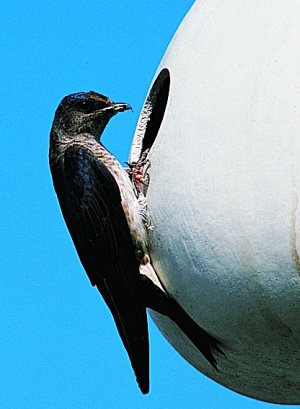
Gourds have been used to make purple martin houses for centuries. Native Americans used to hang them to attract martins to their settlements. Today, martins depend on people to supply them with houses and gourds. If you live east to the Rocky Mountains, you may want to give the matins a hand.
These basics gourd birdhouses are popular with the birds and purple martin “landlords’. The best part, there’s not limit to the number you can produce and hang right in your yard. We’ve heard of one martin enthusiast who puts up and maitnam more than 600 housed every year!
Other birds will nest in a gourd, too. Just customized it with the proper-size entrance hole for the species your’re trying to attract and place it in the right habitat.
premierlandscapinglakewood.net - 216-228-6916
Gourd Birdhouse - What you will need?
Heres what you will need –
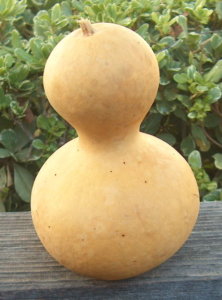
One hard-shell gourd, also known as a bottle gourd, also known as a bottle gourd or birdhouse gourd.
Bleach (for disinfectant)
Fine steel wool
Wood preservative or copper sulfate
Oil-based white enamel paint
Plastic-coated copper wire, 24 inches long
Face mask
Recommended Tools
Power Drill
2-1/8 – inch hole saw or keyhole -saw
Premierlandscapinglakewood.net - 216-228-6916
Gourd Birdhouse - Step-by-Step
1. Harvest a hard-shell gourd when the vine has withered. Be careful to leave the stem attached. It’s best to cut the stem with a pruning shears so you don’t bruise it.
A good purple martin gourd has a diameter of about 8 to 13 inches. Wash it thoroughly in water, rince in a solution of 1 part disinfectant (bleach works fine) and 10 parts water, and dry it with a towel.
2. Hang the ground in a sunny spot or place it on the newspaper in a warm dry spot (such as an attic or basement) for 3 to 6 months. If the gourd is lying on a flat surface, be sure to frequently turn it.
The gourd will begin to mold as it dries - don’t throw it out! This is a natural part on the curing process. Gourds dried indoors will grow the most mold and should be wiped clean frequently with a the same concentration (1 to 10) of disinfectant you used for cleaning. However, discard any gourds that become soft or wrinkled.
3. Check if the gourd is dry by giving it a good shake- if the seeds rattle, you can begin making a birdhouse.
4. Soak the gourd for 15 minutes in hot soapy water, then scagpe it with a dull knife to remove the outer skin and mold. Scrub the gourd in the water with fine steel wool. Rinse it well and aqllow it to thoroughly dry.
5. To locate the entrance hole, hold the gourd by its stem between your index finer and thumb and let it hang. Mark a cent point along the outer most part of the curve so the hole faces straight out-
Not towards the sky or the ground. The hole should measure 2-1/8 inches and can be easily and quickly drilled with the proper –sized hole saw as pictured above. (Be sure to wear a face mask)
You can also use a keyhole saw to cut the entrance by hand. If you do, it’s best to cut the hole immediately after washing the gourd, while its still wet.
Premierlandscapinglakewood.net - 216-228-6916
Gourd Birdhouse - Step-by-Step Continued
6. Make seven drainage holes in the bottom of the gourd about 2 inches apart using a 5/16 – inch drill bit.
7. With the same bit, drill two sets of holes about 2 inches from the top of the gourd’s neck for hanging and ventilation. One set should be drilled perpendicular to the entrance hole and the other in the line with it. (You’ll only use one set of holes for hanging. Choose the pair that will allow the entrance hole to face the most open direction.)
8. Remove seeds and membrane through the entrance hole with a long-handled metal spoon, screwdriver or a wire coat hanger (wear a face mask). If this is difficult, soak the gourd in water for several hours. The inside does not have to be completely clean.
9. Dip the gourd in a wood preservative for 15 minutes, weighing it down with a brick. Then remove the gourd and hand it up to dry for several days. For cheaper alternatives, dissolve 1 pound of copper sulfate (available at garden centers and farm-supply stores) in 5 gallons of warm water and dip the gourd as instructed above. Wear rubber gloves while handling it.
Gourds need to be retreated and repainted every few years. So whatever preservative you use, store the solution in a covered plastic bucket for reuse, but keep it away from children and pets.
10. Sand the gourd smooth and paint with an oil-based primer. Allow it to dry.
premierlandscapinglakewood.net - 216-228-6916
Gourd Birdhouse - The Finish
11. Paint the gourd house with white exterior enamel paint with a nylon brush. (Do not use water-based latex paint because it will peel.) Apply two two coats Be careful not to clog drainage holes.
12. When dry, you can hang your gourd (you’ll need 4 to 6 gourds to attract martins) from a 24-inch plastic –coated copper wire. Thread the wire through two of the holes directly across from each other and hang it from a support line or on a specially made gourd rack. The gourd will swing, making it less attractive to nest competitors, such as starlings.
Hang the gourd 10-15 feet high, with the entrance hole facing an open area.
13. In late August or early September, after the martins depart for their winter homes in the tropics, take the gourd house down for cleaning. Break up nests with the hangle of a wooden spoon and shake out the contents. Then store until early spring (the martins return as early as February in the deep South) in a spot inaccessible to rodents.
Your gourd house will be ready to use again, but you might want to prepare a few more over winter, because the martins will probably bring along a few more friends!
This story is from the book Backyard Projects by Birds & Blooms Books.
premierlandscapinglakewood.net - 216-228-6916


