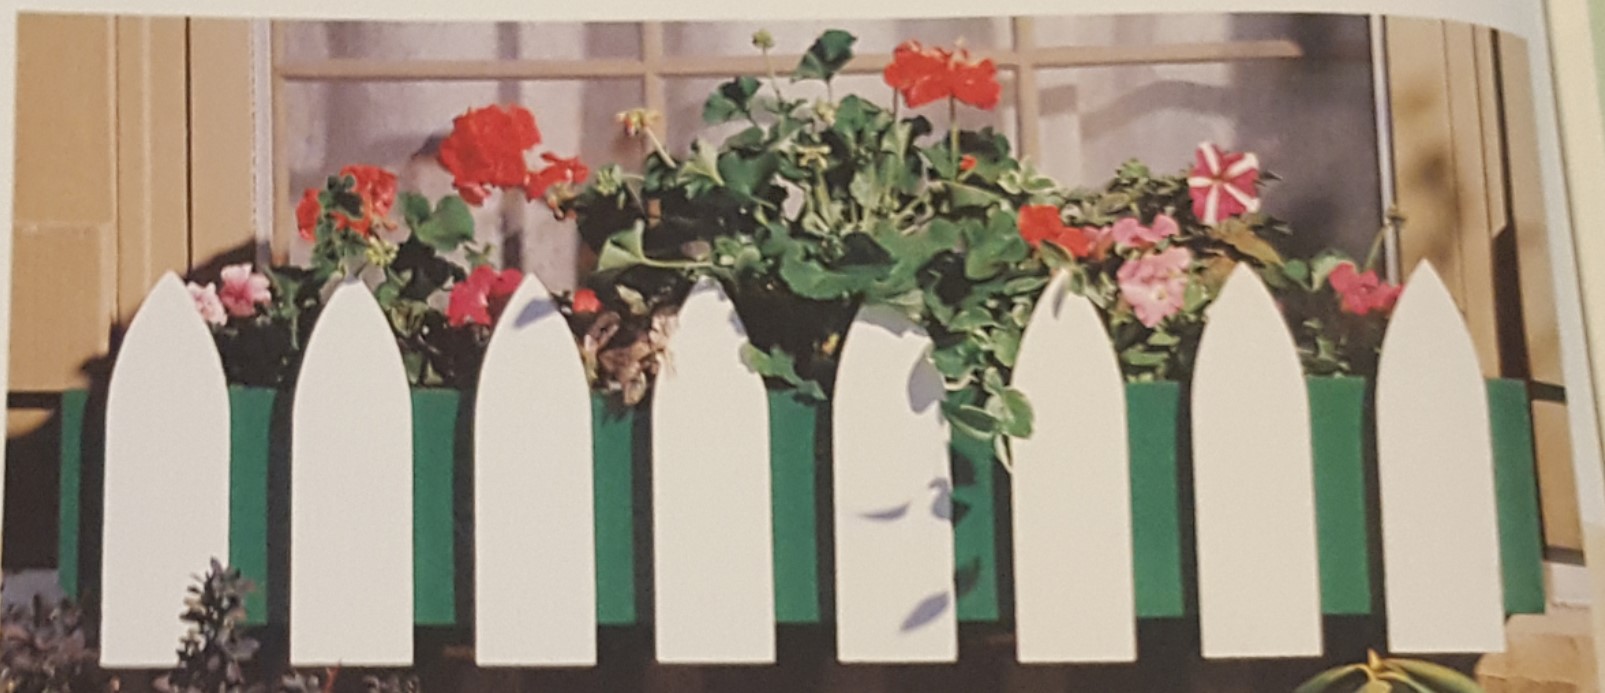
Landscaping Projects: Window Box Planter
‘Picket’ Then Plant It In This Unusual Window Box
Your favorite flowers will look great behind this charming picket fence planter.
1. Measure your windowsill to determine the appropriate length for your window box. Once you decide on the length, cut the back piece of the box from a 1-inch x 8-inch board. Then rip the piece to a width of 6-3/4 inches.
2. Cut the floor of the box from 1-inch x 8-inch board to a length 3 inches longer than the back and bottom rip it to a width of 6 inches.
3. Cut the ends of the box. Rip a 2-inch x 8-inch board that is 13 inches long to 6 inches wide. Then cut two pieces 6 inches long, using the table saws miter gauge.
4. Cut the ends of the box. Rip a 2-inch x 8 –inch board that is 13 inches long to 6 inches wide. Then cut two pieces 6 inches long, using the table saw’s miter gauge.

5. Assemble the box. Start by attaching the back to the end pieces, using 2-inch deck screws (make sure the grain runs horizontally on the end pieces and that the tops are flush), It’s important to predrill and countersink the holes.
Next, fasten the floor to the end pieces with 2-inch deck screws. Then screw the back pieces to the floor with the deck screws. Again, predrill and countersink the holes.
6. Center and fasten the front of the window box to the floor and ends the same way as in the previous step. The piece will extend 1-1/2 inches beyond both ends.
7. Determine the number of pickets needed based on the length of your box. (Select a style that works well with your house. We’ve provided a few examples at right, or you can design your own.)
The pickets measure 3-1/2 inches wide x 11-3/4 inches tall. They’ll be spaced evenly along the face of the box and overhang the bottom by 1 ¼ inches.
Here’s What You’ll Need…
One 13-inch 2-inch x 8-inch cedar board
1-inch x 8-inch cedar boards (length determined by window width and number of pickets needed)
2-1/2 – inch, 2 inch and 1-1/4 –inch galvanized deck screws
1-1/4 – inch galvanized finishing nails
Waterproof construction adhesive
Recommended Tools…
Table saw Combination square
Saber Saw countersink
Power drill Level
8. Cut the pickets from a 1-inch x 8 inch board. Use a saber saw to cut the tops (or a table saw for the dog-ear style).
If you want to paint the pickets a different color from the box (like in the photo at left), now is the best time to do it.
9. With the window box resting on its back, lay out the pickets across the front. Space them evenly and square to the box. (The end pickets on the box pictured above align with the end pieces of the box.) When set, mark their positions with a pencil line on the same side of each picket.

10. Set a combination square for 1-1/4 inch and position the pickets so they hang below the bottom of the box. Attach the pickets with construction adhesive and 1-1/4 –inch finishing nails.
11. Flip the box over and drill ¼ -inch drainage holes in the floor.
12. Rip the window box mounting board 4-1/2 inches wide from a 1-inch x 8-inch board. It should be the same length as the back of the box. Rip the board in half with a 30” cut down the middle making two pieces.
Fasten one piece with the angle pointing down. Flush with the top of the back piece. Use constructions adhesive and 1-1/4-inch deck screws. Don’t forget to predrill holes in the mounting bard so it doesn’t split.
13. The other half of the mounting board will be attached to the house of window frame with the appropriate-size screws. Predrill the holes and hang eth board using a level to make sure the box sits straight.
Now all you have to do is fill your window box with potting soil that drains well and plant some attractive flowers. (If your spouse has been “impatiently” waiting, you might want to plant some impatiens!) Before long, you windowsill will be blooming behind the nice, cozy “picket fence” that you put up yourself.
*You can find this great idea and more in the book Birds & Blooms Books Backyard Projects


